Feeds:
Posts
Comments

Archive for the ‘Vegan’ Category

 
Double Chocolate Chunk Cookies are fudgey, brownie and cookie-like all at once. You'd never believe they're free of many common allergens, including gluten, dairy, and can easily be made minus eggs and tree nuts.

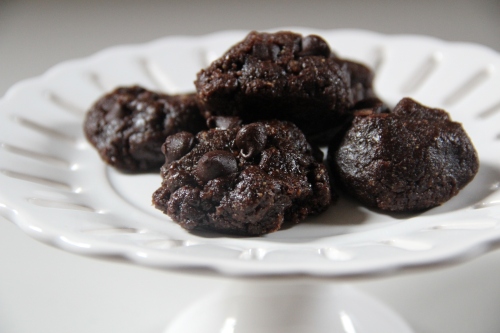
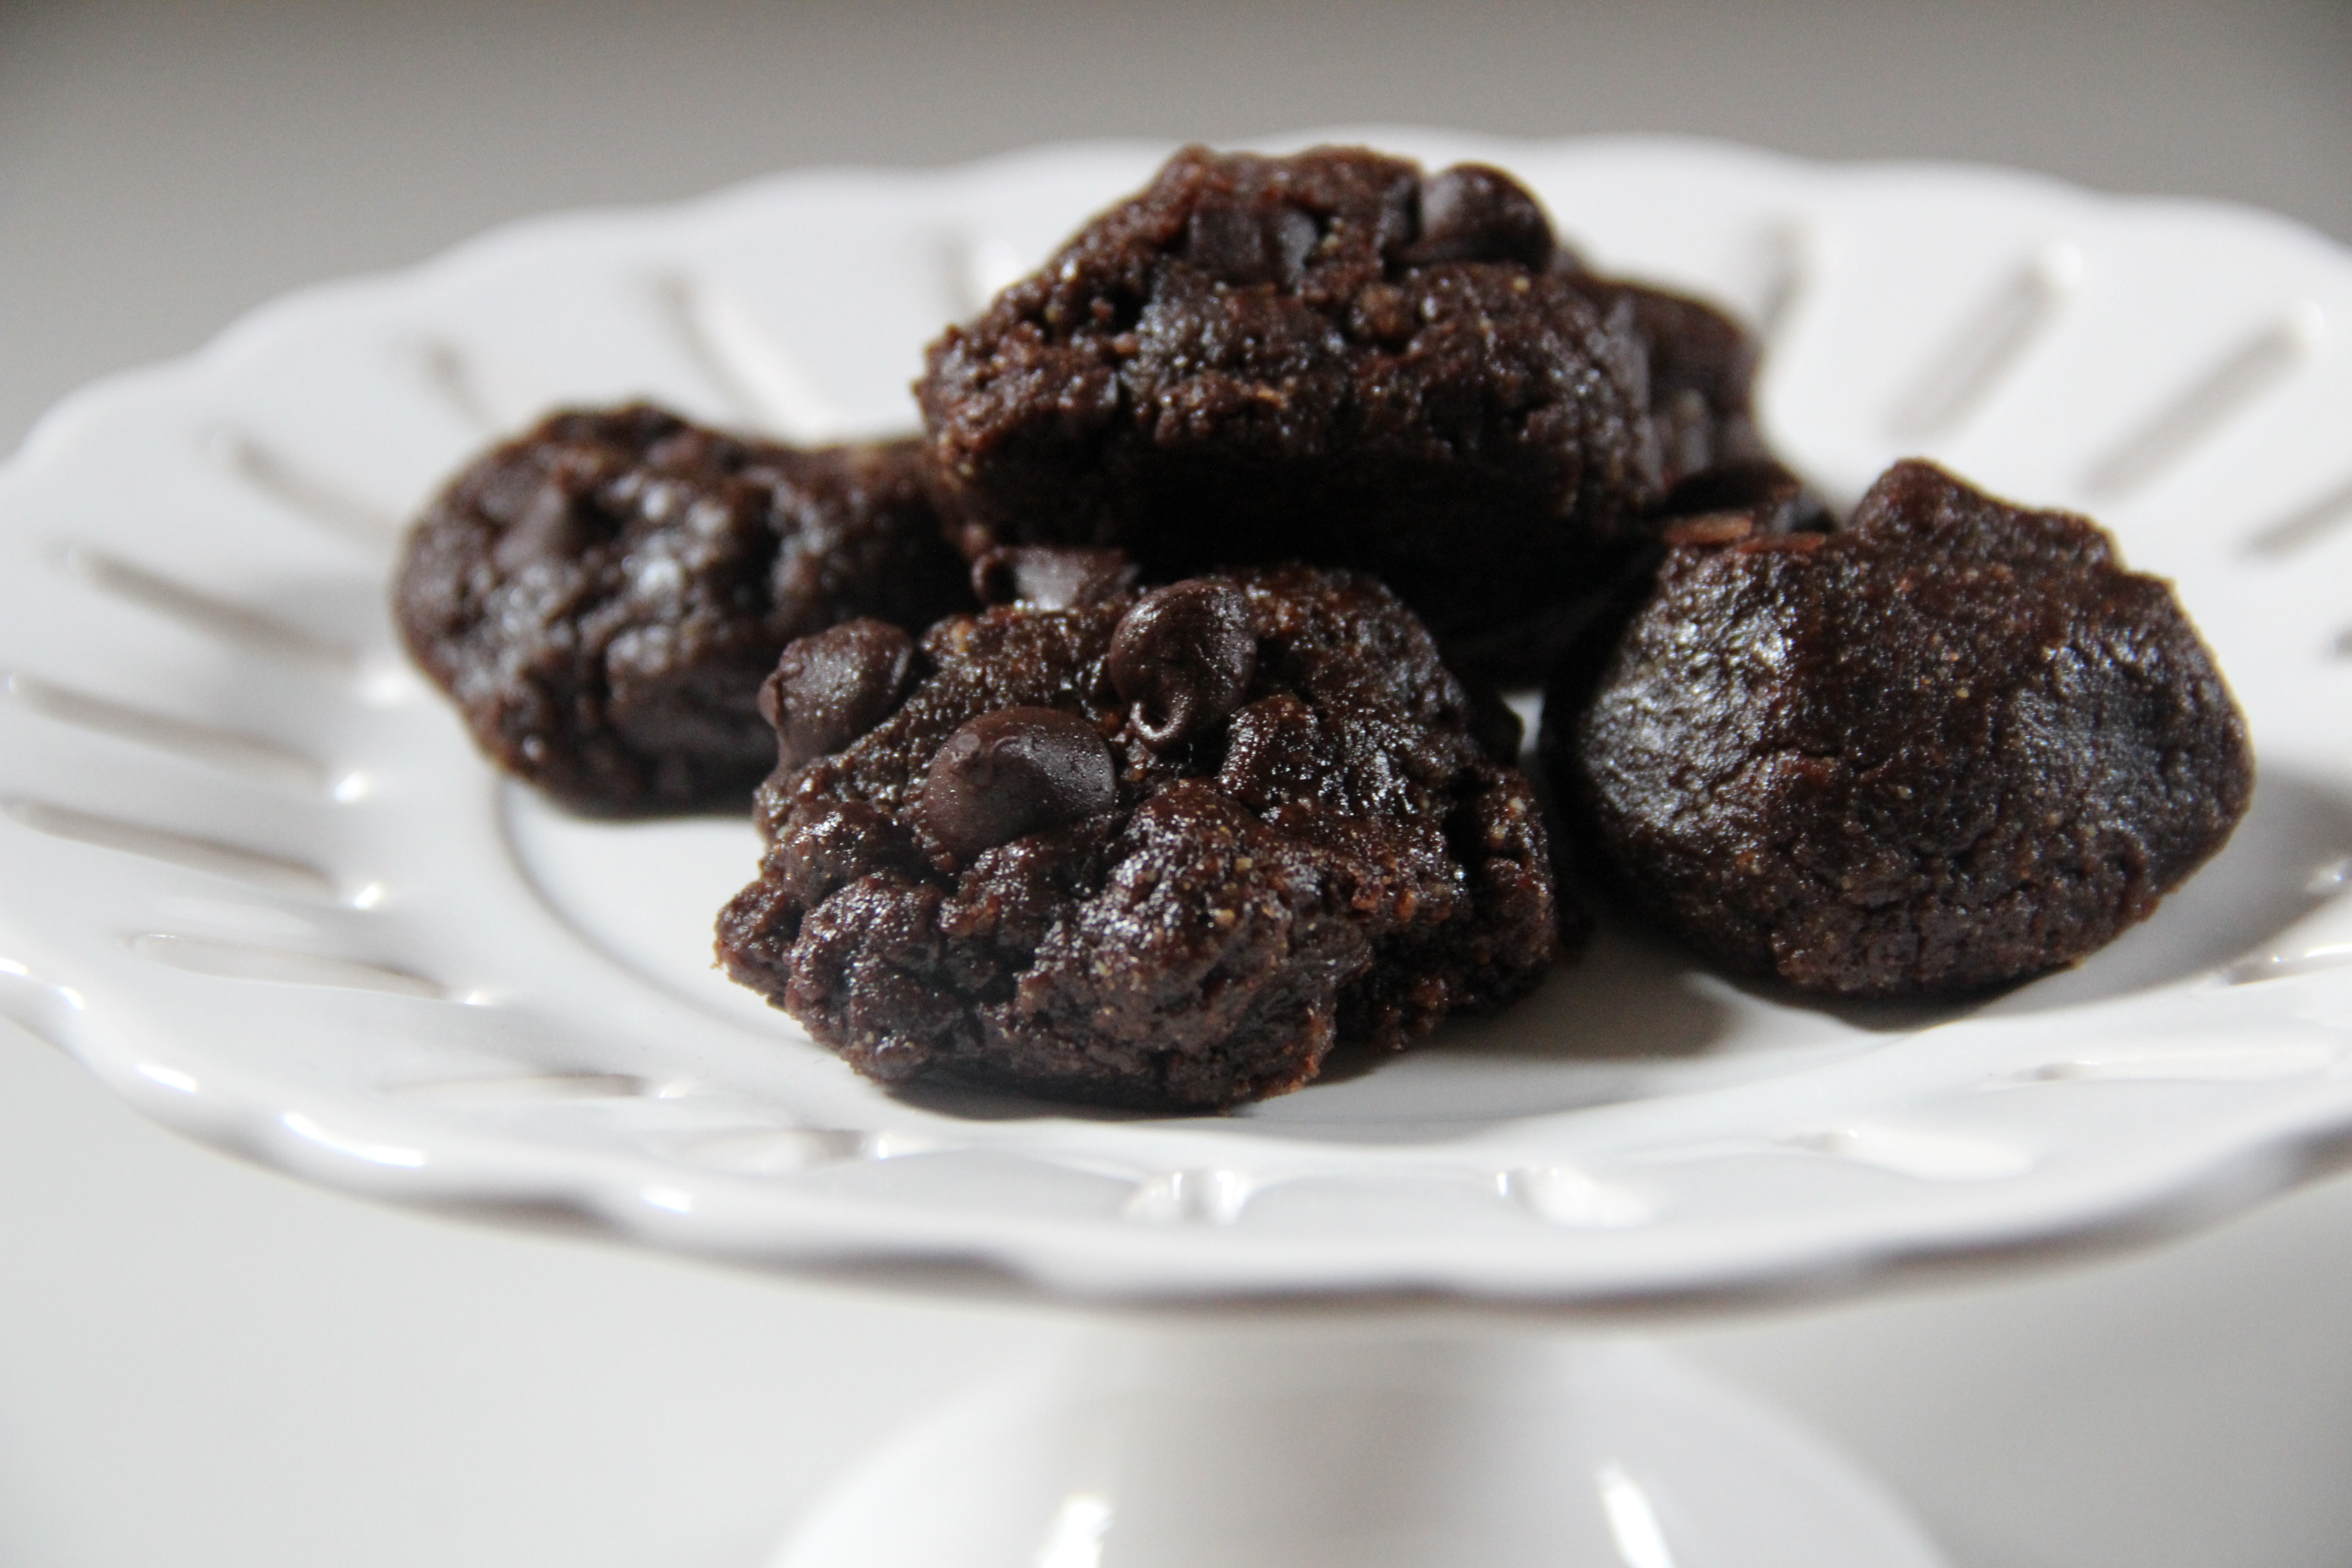
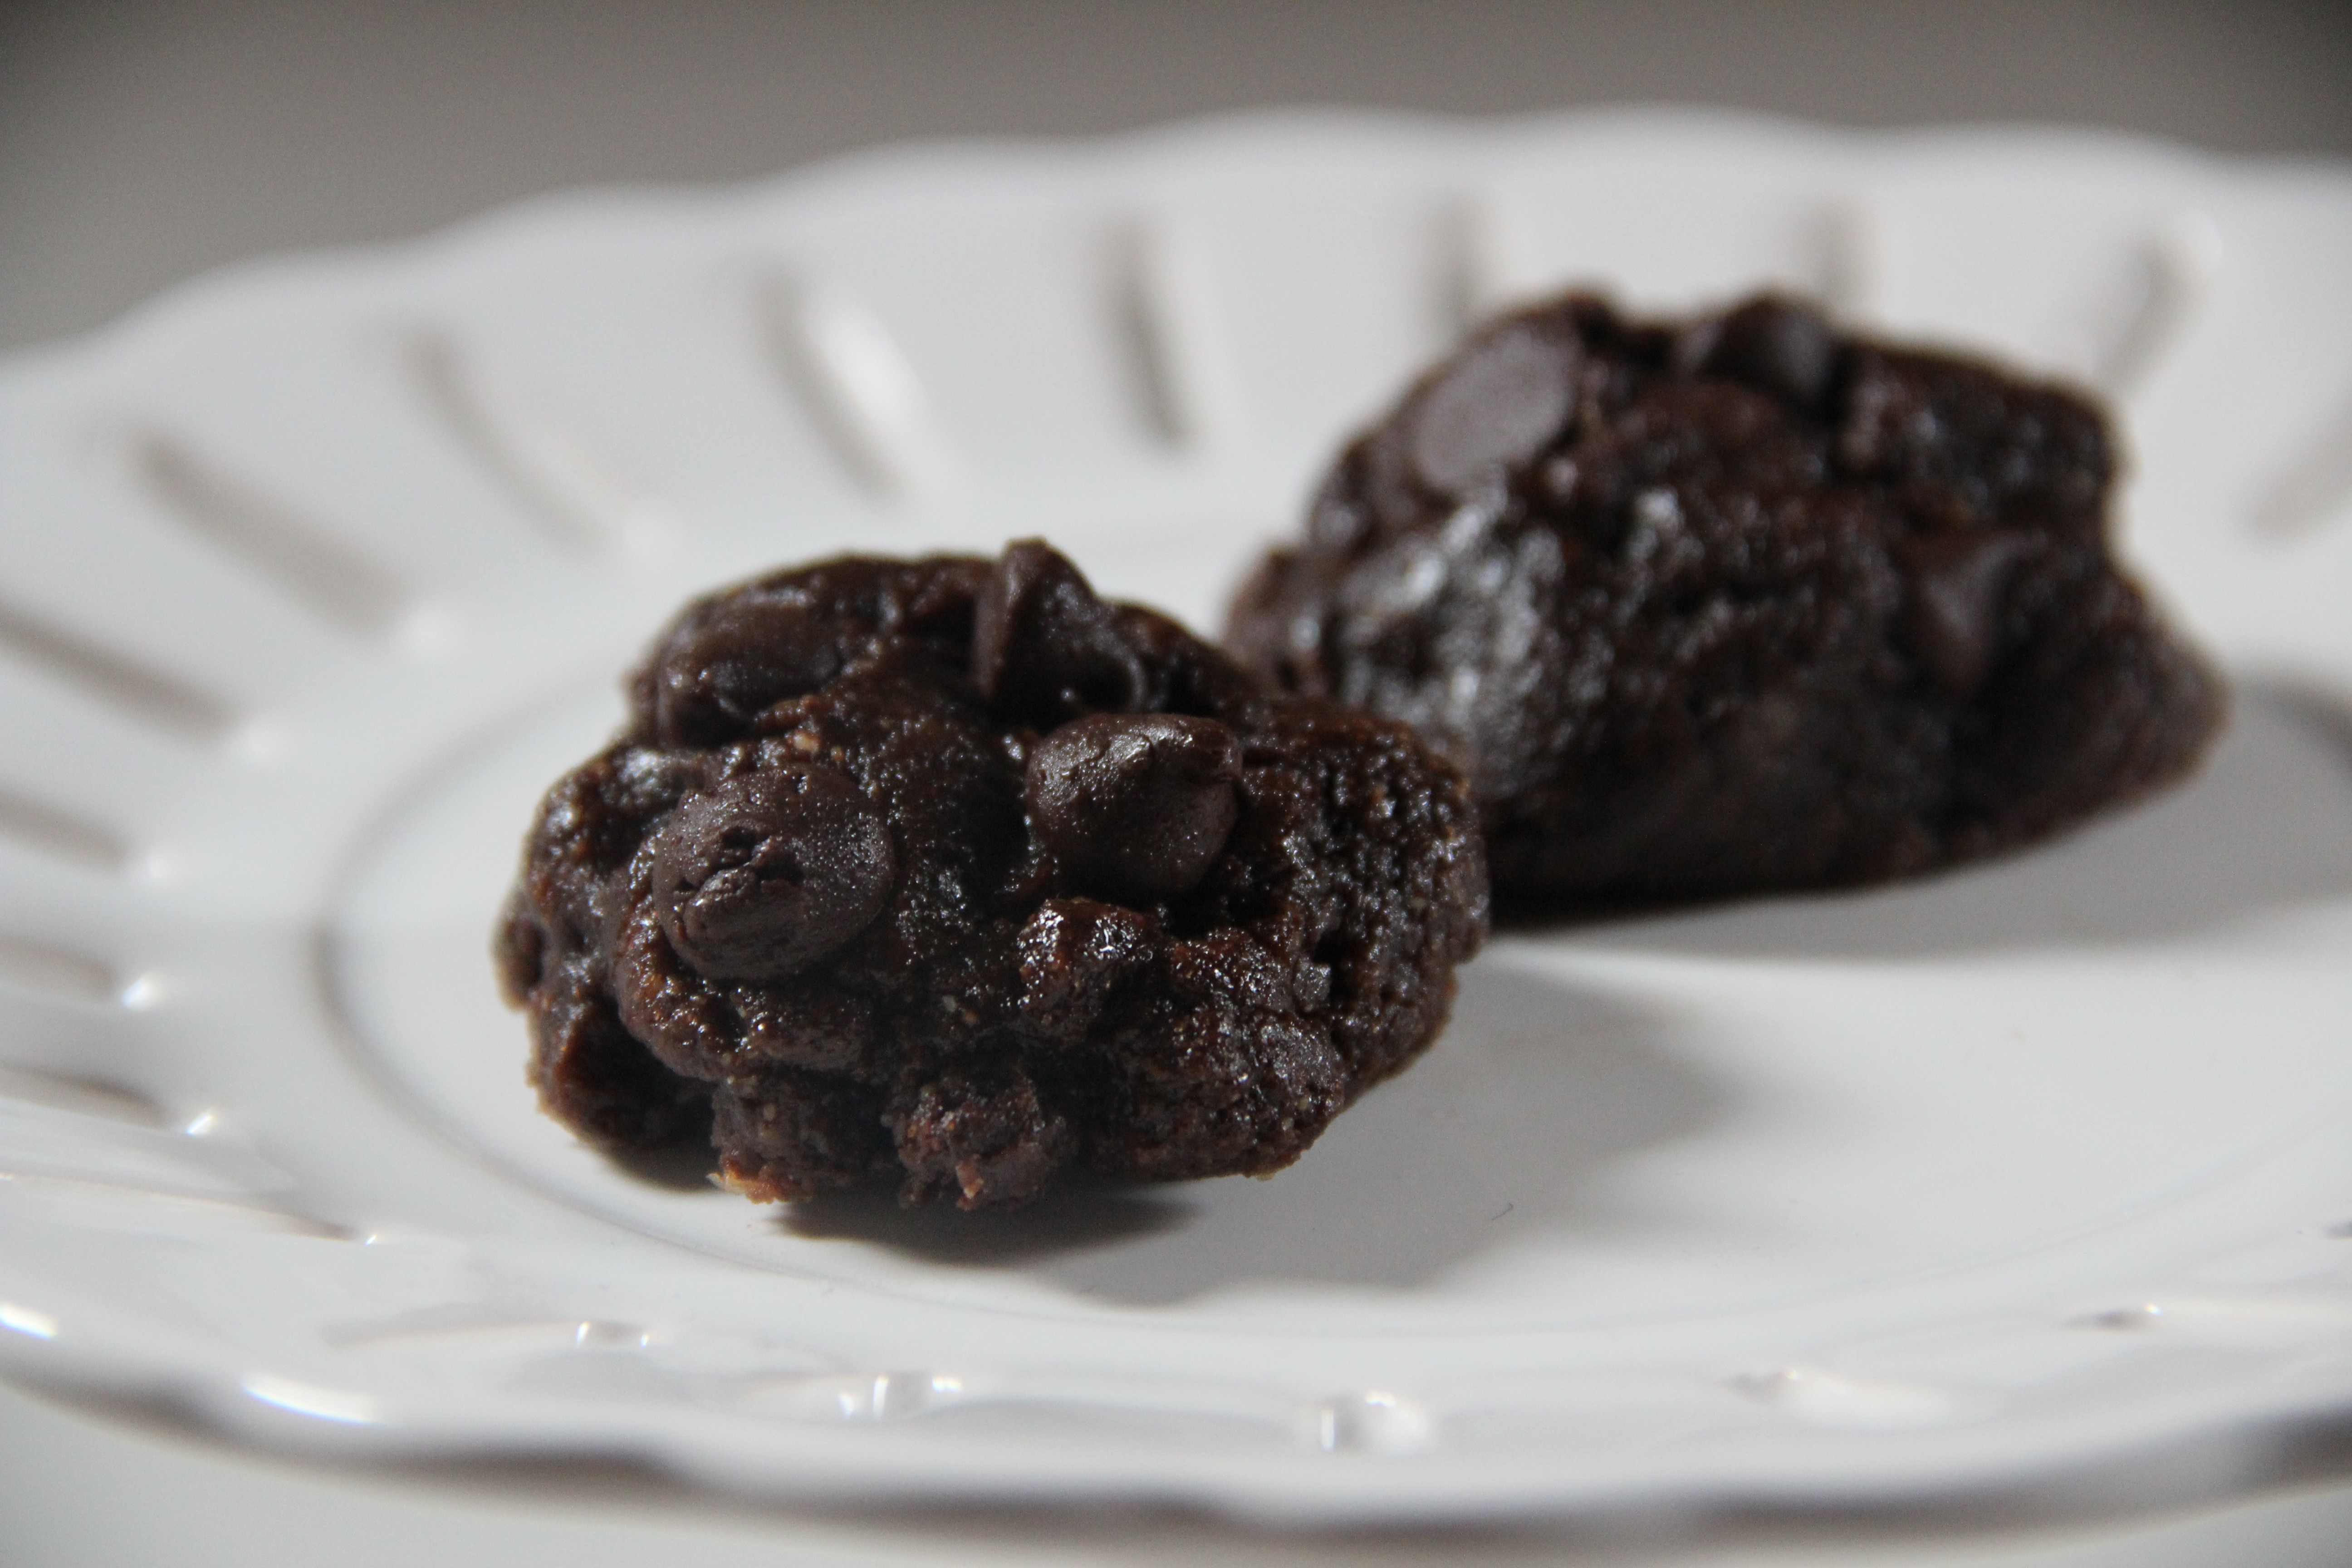
Double Chocolate Chunk Cookies are fudgey, brownie and cookie-like all at once. You’d never believe they’re free of many common allergens, including gluten, dairy, and can easily be made free of eggs and tree nuts. Cookie photos by Kristen Joerger of tiny-gourmet.com  .

This Double Chocolate Chunk Cookie recipe post has literally been years in the making.  A couple of years ago, I ran across a cookie recipe I really liked, and tinkered with it.  Soon, I was baking these babies up, and taking them to house parties, to weekends away, on hikes, and on road trips. People LOVE these cookies. I’ve heard people go so far as to call them “The best cookies I’ve ever had in my life.”

cookiesI’d bet money they’ve gotten me invited back a few places 😉

They were a huge hit at my most recent yoga retreat.

People always request this recipe, yet I always got sidetracked.

You’d never guess these cookies are free of many common allergens. My goal was to make them taste chocolately and decadent, not diet. These cookies have no:

  • gluten
  • dairy
  • egg (if you choose to veganize them, that is)
  • or tree nuts (if you choose the tree nut free option, that is)

Here are some of us at my most recent yoga retreat in upstate New York:

fall retreat group shot 2013 upstate

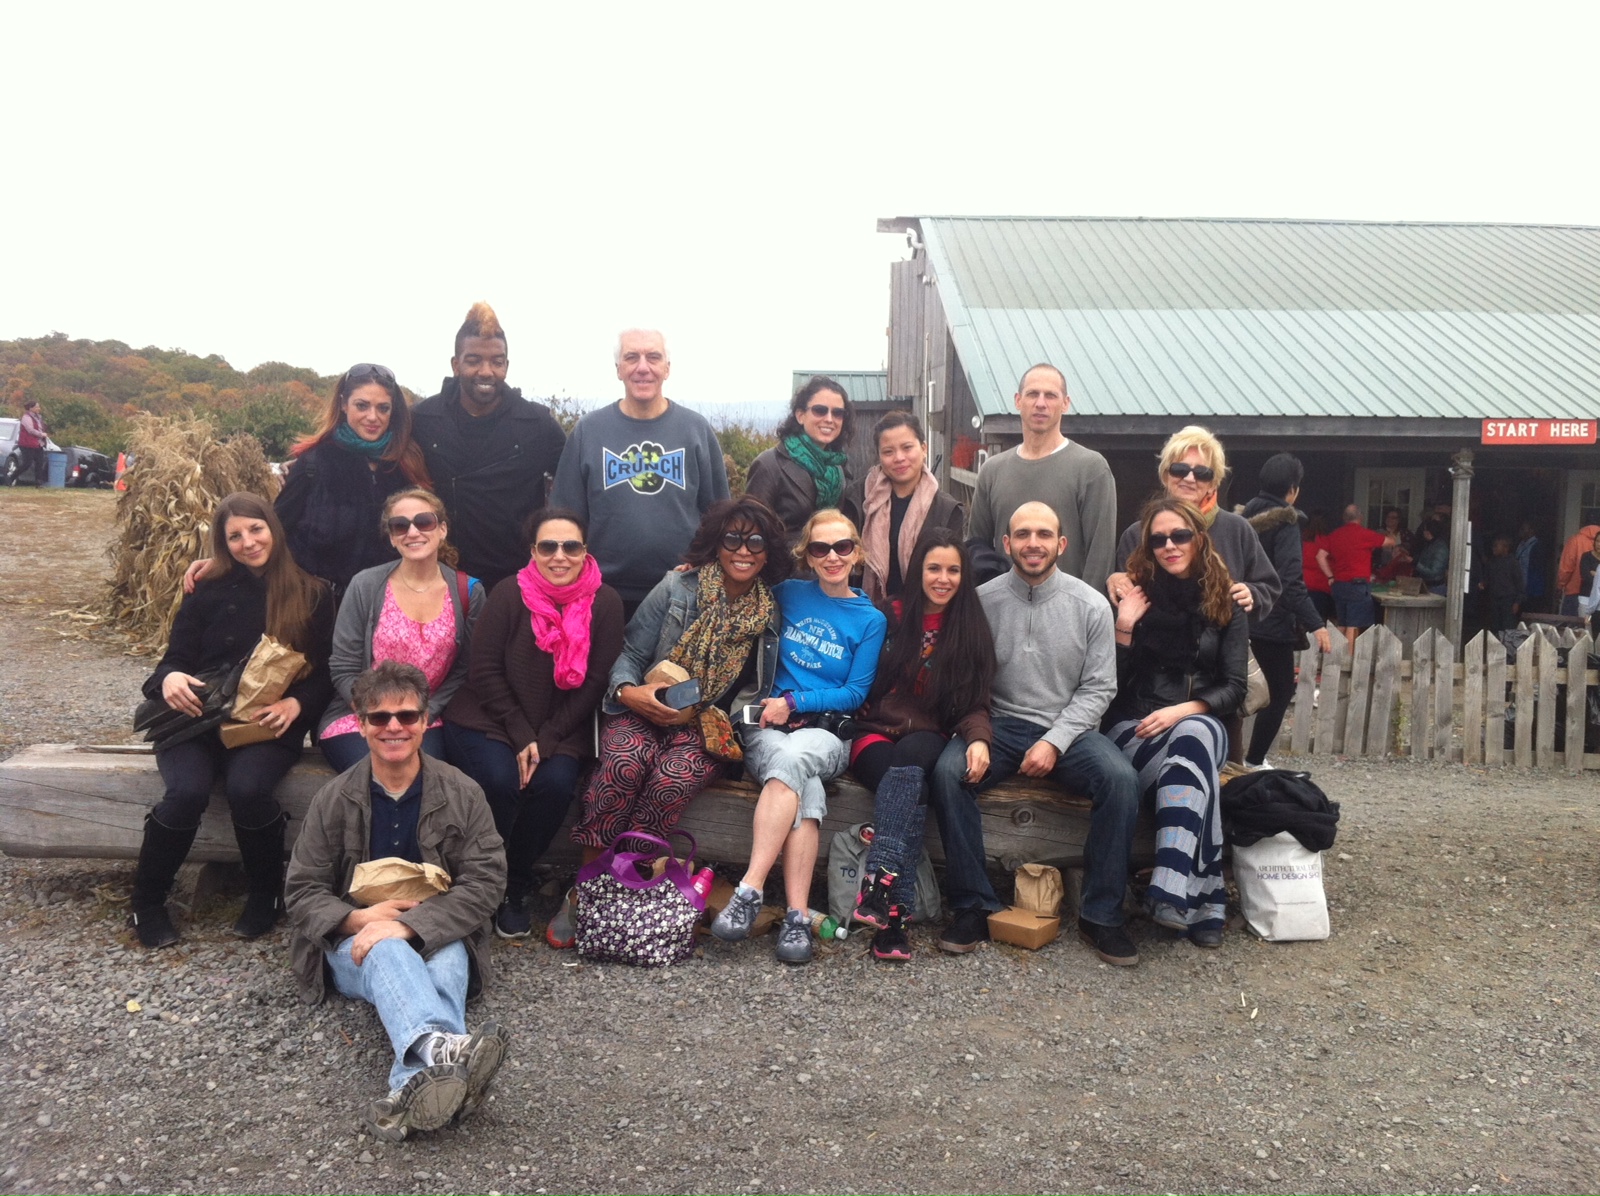
This magic batter traveled with me to my most recent yoga retreat, and the cookies were a huge hit when we packed them into the bagged picnic lunches we took with us to the apple orchard.

These cookies are packed with flavor and a beautiful texture.

Bria’s Double Chocolate Chunk Cookies.

Yield: About 2 dozen cookies.

  • 1 cup peanut butter (or almond butter, or, to go tree nut free, use sunflower seed butter.)
  • 1 cup UNSweetened cocoa powder
  • 1 cup of brown sugar (I prefer dark brown)
  • 1 egg (replace egg by combining 1 tbsp ground flax seeds + 3 tbsp warm water in a small bowl and stirring.  Allow a “jelly” to form after a few minutes and use this as your “egg”)
  • pinch teaspoon salt (leave out if your peanut butter is salted)
  • 2 teaspoons vanilla extract
  • 1 cup chocolate chips, chunks, or half a cup of each (I used Trader Joe’s brand, as they are free of dairy)

1.Preheat oven to 350 degrees F.

2. In a nice, roomy mixing bowl, cream together peanut butter, brown sugar, egg, and vanilla.

3. Begin adding in cocoa powder, 1/4 cup at a time, and mix until well incorporated and moist. If the batter gets too dry, add in bit of water, leftover coffee, or milk of choice to loosen it. Then remix. If batter becomes too loose, add in more cocoa powder to tighten it up.

4. Fold in 3/4 of the chocolate chips and/or chunks. Save the rest for garnish.

5. OPTIONAL/not always necessary: Stash mix in the freezer for 10-15 minutes while you prepare  your cookies sheets. I either line mine with parchment paper, or spray them with cooking spray. One of these days I WILL get a Silpat.

6. Use a cookie scoop or a spoon to make uniform sized dough balls. (I do this by hand and spoon, and each cookie is a generous tablespoon of dough). Do NOT smash cookies down.

7. Place 3-5 chocolate chips and/or chunks on the top of the cookies. You can flip the cookie dough ball upside down and get the chips to adhere that way.

8. Bake cookies for 9-14 minutes, until ever so faint cracks appear on the surface. I know 9-12 minutes is quite a range, but I find that variations in altitude and ovens really do make a difference in bake times. In my NYC toaster oven, these cookies are perfect at 8-10 minutes of baking. In Colorado, I had to go closer to 12 minutes, sometimes beyond, in the “big” oven, to get the right texture.

9. Let cool slightly (or a lot, your choice, but I can never wait too long to try these). Enjoy!

So there you have it. An easy, creative,  recipe that is so delicious, you’d never know it’s friendly to many “restricted” diets and actually kinda healthy.

Question Time:

What’s your go-to dessert?

Read Full Post »

Moist, cakey…like a cross between a cookie, a cake, and a muffin. Cream cheese icing optional. I found these cookies delicious without it.

Carrot cake is awesome, isn’t it? In cookie form, it’s pretty amazing, too. Especially when the cookie is moist and cakey at the same time, much like actual carrot cake. Bonus: cookies are soooo much more portable than cakes, or even cupcakes. Throw these in a picnic basket or lunch box, and you’re good to go.

At my last Yoga retreat.

I rigged up this recipe when looking to create a cookie  for my upcoming Yoga retreat. I wanted something with fall flavors and a comfort food vibe. I looked around online and found a handful carrot cake cookie recipes. With a few modifications, the cookies easily become healthier, with zero loss of flavor or texture.

My carrot cake cookies don’t taste “free” of anything, but they are indeed free of many common allergens, including dairy, gluten, and, if you prefer, tree nuts. Of course there’s sugar, but a moderate amount.  There is egg in them, but you could likely leave it out and just do a flax or chia “egg.” (Leave me a comment if you try it to let us know how it goes). These cookies are packed with flavor and a beautiful texture.

Carrot Cake Cookies

Yield: About 2 dozen cookies.

  • 1 cup (5 ounces) oat flour (simply grind 1 cup whole oats into a flour-like texture in your food processor or blender. If gluten free is a concern, get certified GF oats)
  • 1 Tablespoon pumpkin pie spice (Yes, it’s a lot. Trust me on this).
  • 1 teaspoon baking powder
  • 1 teaspoon baking soda
  • 1/2 teaspoon salt
  • 8 tablespoons sunflower seed butter, at room temperature (I use Trader joe’s brand; Sunbutter brand is good, too)
  • 1/2 cup packed brown sugar (dark or light both work)
  • 1 egg
  • 2 teaspoons vanilla extract
  • 1 cup grated carrots
  • 1/2 cup raisins
  • 3/4 cups old fashioned oats
  • 1/2 cup chopped walnuts (note: these ARE a tree nut; leave out if needed. I personally prefer my cookies minus nuts, and leave them out.)

1.Preheat oven to 350 degrees F.

2. In a nice, roomy mixing bowl, mix dry ingredients: oat flour, pumpkin pie spice, baking soda and powder, salt.

3. In a second roomy mixing bowl, cream sunflower seed butter, brown sugar, and vanilla. Once smooth, add egg and mix until smooth again.

4. Make a well in the wet ingredients. Gently incorporate dry ingredients, 1/3 of the mixture at a time. Fold in raisins, grated carrots, oats, and walnuts (if using).

5. Stash mix in the freezer for 10-15 minutes while you prepare  your cookies sheets. I either line mine with parchment paper, or spray them with cooking spray. One of these days I WILL get a Silpat.

6. Use a cookie scoop or a spoon to make uniform sized dough balls. (I do this by hand and spoon, and each cookie is a generous tablespoon of dough).

7. Bake cookies for 9-14 minutes, until ever so faint cracks appear on the surface. I know 9-14 minutes is quite a range, but I find that variations in altitude and ovens really do make a difference in bake times. In my NYC toaster oven, these cookies are perfect at 9-10 minutes of baking. In Colorado, I had to go closer to 14 minutes, sometimes beyond, in the “big” oven, to get the right texture.

8. Let cool slightly (or a lot, your choice, but I can never wait to try these). Enjoy!

So there you have it. An easy, creative, fall-friendly, carrot cake cookie recipe that is so delicious, you’d never know it’s friendly to many “restricted” diets and actually kinda healthy.

Question Time:

What’s your favorite fall dessert recipe?

Read Full Post »

Homemade almond milk with vanilla. I get a real kick out of using my vintage style milk bottles to bottle up this creamy drink.

My new friend Ellen, who I met in Colorado this summer, taught me how to make homemade almond milk. (I met her via Airbnb when I rented a room in her place for a few nights during a Yoga workshop weekend I was attending. We totally hit it off. She reminds me a lot of my older sister).

Once back in New York, I was out of almond milk one day and pressed for time. So I decided to give her method a whirl rather than running to the store. It couldn’t be a  simpler DIY, and it’s saving me tons of money. Goodbye to buying almond milk for $4 per half-gallon. At Costco, I can get a 3lb/9 cup bag of almonds for around $8. You can really “milk” this one bag, considering you only use a cup of almonds per batch.

Almonds are loaded with vitamin E.

As for the actual recipe: The first couple of batches I made were super rich and creamy. Pretty awesome, actually. When using this milk to make my hot cocoa…oh my LAWD. Amazing! It was foamy, almost like a cappuccino.

Because I made that maiden batch on the fly, I used unsoaked almonds. The milk was a tad grainy. Didn’t bother me, but something to consider.

If you want a thinner milk, just use more water. Soaking the almonds ahead of time will get you a smoother texture, too. I prefer something in between the super rich and super thin (I’m sure there’s a bad joke in there somewhere), so I go with about 5 to 6 cups of water to a cup of soaked almonds. Foamy, creamy, dreamy!

Homemade Almond Milk

Yield: About 8 cups. Recipe can easily be halved.

  • 1 cup of unsalted almonds (soaked overnight in water, if possible)
  • 5-7 cups of filtered water (use the smaller amount of water for a thicker milk)
  • 1 Tablespoon of vanilla extract (optional, or use less if preferred)
  • Sweetener of choice (optional; I usually thrown in a couple of stevia packets. Other options to consider: honey, maple syrup, sugar, etc.)

1. If using soaked almonds, strain and rinse. Add all ingredients into blender, and blend, working from low speed to high. Add more liquid if needed. I let this run for a good minute (or more)  in my VitaMix.

2. Taste for sweetness and texture, and adjust and re-blend as needed.

3. Bottle and refrigerate if not using immediately.

Read Full Post »

Buckets and buckets of dates. Date syrup is an easy way to use up dates so you can enjoy snacking on premium dates like the ones in the pic. Photo courtesy of stock.xchng

I’m loathe to waste anything. Perhaps this is a Persian thing. Or perhaps not. It’s definitely a “me” thing.

Recently, I lucked into a big, fresh batch of medjool dates. They’re creamy, caramel-y, and just perfect. But wouldn’t you know it? I had some other dates lying around that were looking pretty sad.

You know I was not going to let those sad, dried out little dates go to waste. I’d feel too guilty enjoying the plump, sassy ones I’d just been given knowing that the dry, pathetic ones were just sitting there, dessicating even more. Ha!

So date syrup to the rescue.

Me, my student Mythili, and Meera, at the Wanderlust Festival in Vermont earlier this summer. It was one interesting and fun June weekend!

Now I have a sweetener for my tea, baked goods, no-bake sweets, and whatever else I can think of. Best of all, it’s natural and makes good use of mineral-packed dates. And I get to snack on those other awesome dates guilt free. Well, not completely guilt-free. I don’t fast for Ramadan. Mad props to those who do, but I don’t. So in an act of restraint, I’ll try not to eat too many dates during the day as the fasting month kicks off in a few days. (Dates are a popular food to break the daylong fast with).

As to the recipe, it’s so simple, I’m not typing out a formal recipe. Because it’s summer and I roll super simple in the summer. Ha!  In my Vita-mix, I blended:

  • 20 dates, pits removed
  • 1 and a half cups of water
  • 1 Tablespoon of lemon juice
  • 1 teaspoon of vanilla extract

This yielded a good two cups of syrup. I just blended until it was smooth, which made the syrup liquidy and pourable. If you’re looking for a thicker texture, use less liquid.

I’ll be back at some point with a re-cap of some of my summer travel adventures, including my taking to the streets of NY on my bike. But for now, I’m off to enjoy more watermelon, which I’ve been eating tons of lately, and a chill evening. You all take care and stay cool.

Read Full Post »

At my recent Yoga retreat, quinoa was on the menu, but we ended up not making it. We had so many other delicious things, so it fell out of the rotation. I didn’t miss it, because I thought I didn’t really like it. Until now. You will, too, I bet. You could even take this to any Fourth of July festivities you might be celebrating this weekend. It’s easy to make and travels well.

I used white, also known as yellow, quinoa in my recipe. Look for it in the rice/grain section part of your store. Technically, it's not a grain. It's a seed. And it's gluten-free and very high in protein as well. Photo via wikipedia.

Back to my quinoa breakthrough. Imagine, cooking quinoa according the package directions, and it turning out awesome? Who’d have known? Certainly not me, as I’m not always one for following directions. I can barely make my own recipe the same way twice, much less another person’s. Ha!

I stumbled upon this recipe the other night when “shopping in my cabinets.” I decided to do something novel for me and made the quinoa according to the package directions (fry a cup of quinoa for 20 seconds in butter or oil, add two cups of boiling water, cover, simmer for 20 minutes, covered, over a low heat).

Happy Birthday, America. You're 235, you say? Well, you're forever 21 to me.

As it cooked, I chopped up a bunch of veggies that were hanging around unused: some roasted red peppers, celery, a couple of artichoke hearts. I added a can of (drained) white beans. Then I mixed this all into the fluffy quinoa, along with a couple of drizzles of olive oil, some ground cumin, and some Trader Joe’s 21 Salute seasoning (salt-free and very versatile!) I threw in some nutritional yeast, too.

It was a hit, and a new summer staple was born. It tastes lovely hot, cold, or at room temp. It travels well, and it’s light yet filling. It’s a flexible recipe: vary the veggies and spices and come up with  your own combos. Plus, quinoa is high in protein; along with the beans and veggies, you have a balanced one-dish meal or side.

Quinoa, I’m sorry for my past indifference and for leaving you out of the retreat festivities. I promise I’ll make it up to you somehow, someday!

Fluffy Summer Quinoa Salad

Ingredients to serve 4 as a side, 2 as a main dish:

  • 1 cup quinoa
  • oil or butter of choice
  • water
  • veggies of choice (such as peas, peppers, onions, artichoke hearts, asparagus, olive chunks, scallions, whatever you desire/have on hand)
  • 1 can of bean of choice, drained (I used white beans)
  • salt and pepper to taste
  • spice blend of choice (I used Trader Joe’s 21 Seasoning Salute)
  • ground cumin (couple of pinches)
  • nutritional yeast or parmesean cheese, grated (optional)

1. Cook quinoa according to package directions.

2. As quinoa cooks, chops up veggies, drain beans, and gather spices.

3. Once quinoa is done (takes about 20 minutes), remove from heat.  Fluff with a fork, add spices. Lightly stir. Add oil. Fluff a bit again. Add veggies and beans and stir again. Taste and adjust seasoning, oil, and veggies amounts if   needed. That’s IT!

Read Full Post »

Ginger, garlic, and chile are the foundations of this simple soup. I used chipotles that were pre-cooked in adobo sauce, but you could use other peppers if that's easier for your. Photo courtesy of stock.xchng.

What’s that old saying?  “Life is what happens when you’re busy making other plans.”

That’s what this week feels like. Here I was with big plans to do the following:

  • A thorough, if late, deep housecleaning to prep for Persian New Year (Nowruz).
  • Batches and batches of cookies baked (and photographed and blogged about!)
  • To send out some of said treats as gifts.
  • A delicious Persian New Year feast over the weekend.
  • Oh, and to teach just shy of 20 classes. . .
  • . . . AND to serve as a bridesmaid in my friend’s wedding this weekend.

Yeah, right. That sound you hear? That’s the Universe laughing at my plans.  Loudly. I’m laughing now, too, at myself for thinking I could get all of that stuff done, even under the best of circumstances. You see,  I started feeling not so great late last week, and haven’t been quite able to shake the feeling since. So I scaled back on my ambitions, focusing on resting and working and, quite frankly, just getting through the week. (Don’t worry, I don’t teach with a fever and I’m not doing adjustments this week just to be on the ultra-safe side).

I have so much garlic around my place. It's slightly ridiculous, and no, I don't fear vampires 😉 Photo courtesy of stock.xchng.

I also threw everything but the kitchen sink (and the doctor) at this annoying bug. You name it: Vitamin C, immune supplements, kombucha, juices, garlic, ginger, spices, cake, sleep, TV, movies, tea, menthol, baths, books, carbs, probiotics, Swedish bitters, and probably at least a half-dozen more things.

It’s been quite stubborn. Very strange, considering I’m rarely sick.

On the positive side, I did make a soup that truly helps me feel better. I breathe deeper and feel less achey when I eat this. It’s super simple to make, otherwise I never would have made it. Ha! It’s not Persian, not even Middle Eastern. It IS good, though, and I’m so grateful for the simple healing powers of ginger, garlic, and chili. When tossed in my slow cooker, they created some kind of magic:

Spicy Soup with Ginger, Garlic, and Chili Pepper

Ingredients

  • 1 chunk of ginger, peeled (about 2 Tablespoons)
  • As many garlic cloves as you want, peeled (I did about 5)
  • 2 chipotle chiles in adobo sauce (can sub other chiles if that’s easier for you)
  • 1/2 medium onion, in chunks
  • 32 ounces chicken or veggie broth
  • 2 potatoes, cubed
  • 1 cup of baby carrots, cut into bite-sized pieces
  • 1 can chickpeas, drained (14-16 ounces)
  • Slivered scallions for garnish (optional)
  • Avocado as a topper (optional)
  • 1 Teaspoon cumin (optional; if you don’t use chipotles in adobo, use some cumin to pick up that smoky flavor)
  • Salt and pepper to taste

Directions

1. In a blender, combine ginger, garlic, chili, onion, and broth. Blend until smooth.

2. Pour mixture in a slow cooker. Add potatoes and carrots, and cumin, if using. Stir. Cook for 4 hours.

3.  Stir in chickpeas. Taste and adjust seasoning (the broth can be salty, so make sure to taste first before adding salt)

4. Ladle into bowls and serve topped with scallions and/or avocado chunks.

Read Full Post »

Stressing over making a homemade dessert for Valentine’s Day? Don’t worry, my loves, I gotcha covered with a few simple, quick options:

Chocolate Almond and Apricot Truffles

Chocolate almond apricot truffles are an easy cookie to make. Gluten-free flour works in this recipe, by the way (I used Bob's Red Mill).

Or you could salvage a broken cake with my Chocolate Cherry Trifle:

This trifle is any easy way to salvage a broken cake, or use up leftover chunks of chocolate cake or brownies. The layers make it look pretty and deliberate 😉

Another fun and easy option: Molten Chocolate Cakes with a Middle Eastern Flair

This cake is really molten, to the point of oozing apart like lava. Ha! If you'd rather keep it together, just bake in ramekins to serve.

If chocolate’s not your bag, but jewels are, consider:

Bejeweled Biscotti with a Persian Twist:

Persianized biscotti. Yes, these cookies could be dipped in melted chocolate, if you're so inclined.

Dunk your biscotti in some Persian Hot Chocolate:

!

Hot chocolate infused with the finest Persian saffron and cardamom? Win!

Portion Control a Concern? Try:

Frozen Hot Chocolate “Shots” With a Goat Yogurt Topping

Petite shots of chocolately goodness!

I hope these options help. I’m working on one more chocolatey goody, which tastes amazing, and is gluten and dairy free. I’ll post it soon.

Read Full Post »

Chocolate and banana is a winning combo any day.

Dunno about you, but the recent events in the Middle East, combined with the relentless weather we’re having here in New York City, make me want to crawl under the covers and hide, preferably with a delicious, comforting dessert in hand.  Alas, hibernating isn’t really an option for me, or for most of us, I imagine.

But we CAN have a luscious dessert every now and then when we desire escapism. As my English Lit prof used to say, “Why the hell NOT?”

Maybe a chocolate cherry trifle made with leftover chocolate cake?

Or how about a creamy, dreamy pudding parfait? Yeah, sounds good to me right about now. Plus, it’s the perfect excuse to bust out my parfait glasses. But. . .

Making pudding from scratch certainly not my thing. In the immortal, hyperbolic words of my friend Denise, it “ruins my life.” Yeah, safe to say that custard making and I don’t get along. Ugh, I simply hate making custard. It always breaks or curdles on me, and frankly, I have limited patience for endless whisking, or for recipes that take too much time.

Avocados are the surprise ingredient in the easy, fast, chocolate pudding element of today's recipe. Vegan chocolate pudding? Yes, it does exist, and it's easy to make.

Luckily, when in the mood for something custard-y, I’m not above using instant pudding and have figured out, via my blogging friends, a fast, healthy way to make a chocolate pudding that involves nothing but the blender and a few ingredients you likely have on hand already: avocados, cocoa powder, bananas, a bit of liquid, and sweetener. It’s a pudding that’s actually quite healthy. It’s full of good fats from the avos and chocolate is healthy in moderation. (Yes, you read right: avocados and chocolate, so read on!)

The bananas in the chocolate pudding give it sweetness, so go easy on the added sweetener (taste as you go).

Milk Free Banana Chocolate Pudding Parfaits with Cardamom

Ingredients

  • Banana pudding mix (3.5 ounce box; check ingredients for milk if this is a concern)
  • Coconut milk in the amount prescribed by the pudding box directions (usually 2 cups)
  • 2 teaspoons cardamom powder (optional)
  • 2 small, ripe avocados or 1 large avo
  • 1 medium banana
  • 4 Tablespoons unsweetened cocoa powder
  • Sweetener, options include: agave, maple syrup, date syrup, simple syrup. (Start with a Tablespoon and add more to your taste as needed. If using liquid stevia, start with a drop or two, then work your way up as needed.)
  • Chocolate chips or shavings for garnish (optional)
  • Fresh banana slices for garnish (optional)
  • Whipped topping for garnish (optional; use non-dairy if you’re staying milk-free)

Directions

1. Make banana pudding according to package directions, adding 1/2 of the cardamom powder to the mixture as you blend. Place in the fridge to chill for at least 5 minutes while  you make the chocolate pudding.

2. In a blender, place flesh of avocados, chunks of banana, cocoa powder, remaining cardamom powder, sweetener (if using), and a splash of coconut milk or water to help things blend. Now blend until smooth. Add more cocoa powder if you need to thicken. Thin it out with liquid if needed. Test for sweetness, and add more sweetener if needed.

3. Make sure banana pudding is set and “scoopable” with a spoon. Once it’s set, in a decorative parfait glass, layer puddings in alternating layers, starting with chocolate pudding first (it is denser than the banana pudding). End with a layer of banana pudding, then top with garnishes of choice, if using. Settle in under the covers or on the nearest couch, and enjoy.

Read Full Post »

Fesenjan is a beloved Iranian pomegranate-walnut stew. It can be made with chicken, duck, or without meat. What you see above is a version made with mushrooms and chickpeas, a departure from the classic recipe. Note my greenery "garnish" isn't really edible 😉 This is my fast, 15 minute version of khorest fesenjan.

Yes, you read right. A 15-minute version of beloved Persian koresht fesenjan.

What??????

For the uninitiated, it’s a stew of ground walnuts, pomegrante molasses, and, often, chicken. It has a sweet and sour flavor that might sound weird on paper, but tastes oh-so-good on the palate. It also has a bit of a reputation: a rep as something that takes a good while to cook.

We chatted about this recipe on here before:

But today’s offering is a quickie take on the slow-cooking classic. Over the weekend, a reader, Almaz, and I were chatting on Facebook. She loves the blog and had such kind words of encouragement for me. I was really touched. So I asked her if there was anything in particular she’d like me to post about. She jokingly (I think), said “15 minute fesenjan.” I immediately thought about a slow cooker version, that potentially could have only 15 minutes of hands on time.

Then today, while tinkering around in the kitchen, I realized a truly fast fesenjan, made in 15 minutes from start to finish, IS doable. If you have the following, already ready:

  • Pomegranate PASTE or MOLASSES (pre-thickened, you see!)
  • Ground walnuts.
  • Pre-cooked chicken (if using).
  • Pre-cooked rice (if serving over rice). Or you could use quick cooking rice. (Not as tasty as homemade, but just sayin’)

So here we go. Don’t blink, guys, or else this recipe will be over before you know it:

15-Minute Khoresht Fesenjan (Pomegranate Walnut Stew)

Time: 15 minutes

Yield: Approximately 4-6 servings. ( The nuts make this a very rich dish.)

Ingredients

  • Neutral cooking fat of choice (butter, grapeseed oil, etc)
  • 1/2 medium onion
  • 1 cup pre-ground walnuts
  • 1 Tablespoon sumac
  • 1 teaspoon ground coriander
  • 1/2 teaspoon ground cumin
  • 1/2 cup pomegranate molasses or pomegranate paste (can find on Amazon)
  • 10 ounces of mushrooms (optional)
  • 1 cup of chicken broth, vegetable broth, or water
  • 1 14-16 ounce can of chickpeas, rinsed (optional)
  • 1 cup of pre-cooked chicken, cut into bite-sized pieces (such as leftover roasted chicken)
  • Honey, sugar, or agave nectar to taste
  • Salt and pepper to taste

Directions

1. Over a low heat, heat oil or butter in a Dutch oven.

2. As fat warms, dice onion.  Add it to the pan and cook for about 5 minutes, stirring periodically. (Chopping the onion very small will help it cook through faster).

3. As the onion cooks, slice mushrooms (if using) and drain and rinse chickpeas (if using).

4. Lower the heat, and add walnuts to the onions. Toast walnuts lightly, turning often, for 30-60 seconds, or until you smell a hint of fragrance. Immediately add in spices, and cook for about 30 seconds more. Turn heat off.

5. Add in the pomegranate molasses/paste, stock or water. Stir well, then add in any of the following that you’re using: chicken, mushrooms, chickpeas. Put the heat back on, then increase heat to high until stew boils. Drop the heat down to low.

6. Cook for 5 minutes more, until mushrooms are cooked through and chicken, if using, is warmed through. (You can cook this dish longer if you wish, up to half an hour, but the shorter cooking time works if you’re in a hurry).

7. Adjust seasonings to your taste. If you want it sweeter, add in sweetener of choice, stir, taste. Repeat until you’ve reached your idea sweet-sour ratio.  Serve over rice of choice and enjoy.

That’s IT!

Enjoy it over rice of your choice.

Read Full Post »

Persian Sugarplums. These are simple and can be made quickly with any dried fruits and nuts you have on hand.

Merry Holidays, everyone! Does anyone really know what sugarplums are? What confection, precisely, is that Sugarplum Fairy in The Nutcracker dancing for anyways?

Turns out they’re balls of dried fruits and nuts, sometimes with spices added in, perhaps coated in powdered sugar. Well, besides sounding Christmasey, this all sounded very Persian to me. So I tooled around online, found some simple sugarplum recipes, and tweaked them to add a Persian twist. Voila!  Beautiful, tasty, festive holiday treats.

Simple to make, tasty, and these goodies actually taste better as the days go on. Time in the fridge give their flavors time to meld.  They’re plenty sweet, but perhaps a nice change of pace from all the cookies you might be enjoying lately.


These easy to make sugarplum are fast to prepare, and excellent with a cup of perfectly brewed hot tea.

Saffron-Infused Sugarplums

Prep time: 20 minutes or less, depending on what method you use to prep your fruits and nuts

Yield: Approximately 20 balls

Note: You can play around with the proportion of fruits to nuts, the types of fruit and  nuts that you use, and the spices. This recipe is extremely flexible.

Ingredients

  • 1 cup of slivered almonds
  • 1/3 cup pistachios, shells removed
  • 2 cups of mixed dried fruit. (I used Mariani’s mixed fruit, a blend of tender fruits I get at Costco, which includes apricots, plums, peaches, pears, and apples)
  • 1/2 c cup dried sour cherries
  • 1/4 cup honey (if vegan, use a vegan friendly option like molasses, agave, etc)
  • Pinch saffron dissolved in about a tablespoon of hot water
  • 1 Tablespoon pumpkin pie spice blend or Persian Spice Blend (Advieh)
  • 1/2 teaspoon vanilla extract (optional)
  • Shredded coconut flakes and/or confectioner’s sugar for garnish (optional)

Directions

1. Chop nuts into pieces, either via hand, crushing them with a rolling pin inside a bag, or use a blender or food processor to pulse once or twice to chop the pieces.  Chop or food process/blend the the fruits as well. Remove fruit and nut mixture from food processor or blender (if using), and set aside in a bowl.

2. Add honey to another bowl. Infuse honey with saffron and hot water, and then add in the pumpkin pie spice or Persian spice blend and vanilla (if using). Mix well.

3. Combine honey mixture with fruit/nut mixture, and mix very well.

4. Use your hands to form this mixture into balls. (Mixture will be very sticky. Keep a dampened cloth handy to wipe down your hands periodically). Roll in confectioner’s sugar or coconut flakes, if using. Refrigerate in an airtight container and enjoy at your leisure.


Happy Holidays, Merry Christmas to those who celebrate it, and wishing every one of you a fantastic 2011!


Read Full Post »

Older Posts »