Feeds:
Posts
Comments

Posts Tagged ‘appetizers’

Oven fried chicken nuggets stay moist thanks to a coating of nut butter, and crunchy courtesy of panko crumbs. Early-season broccoli rabe is my veggie side, and Trader Joe's Mango Ginger Chutney serves as the dipping sauce du jour.

I love chicken nuggets. I know, really sophisticated of me? Ha!

Edited to Add: I was born and (mostly) grew up in Texas, where fried chicken was on the weekly menu rotation, at least in my earliest years. I’ve always loved it. Just the smell of it makes me nostalgic. But I can’t always eat it, for obvious reasons. These flavorful nuggets satisfy the crunchy, chicken-y craving, and aren’t as messy and hot as frying up a batch of chicken. Plus, my fried chicken never seems to taste quite as good as my mom’s.

Luckily, I’ve figured out how to give chicken nugget morsels a healthy, grown-up, and tasty upgrade.

The key ingredients? Nut butter plus panko bread crumbs (that stuff that makes tempura so crunchy and awesome at your favorite Japanese spot. Panko bread crumbs have become increasingly common in regular grocery stores in recent years. Progresso brand makes them, as does Roland. Roland is the brand I used in this recipe. I paid about $1.25 on sale for my 7 ounce bag, which will last awhile).

Yum!

Coating chicken chunks with the nut butter of your choice is a great way to get crunchy panko crumbs to stick, and stick well, to the chicken pieces. Then just pop them in the oven for 15-20 minutes, and you have an irresistible nugget delight. The nut butter gives them another boost of flavor, and keeps the breast meat, which often tends to dry out, nice and juicy.

No panko crumbs? Try regular breadcrumbs from the store. Gluten free needed? Then coat the nuggets in nut butter, followed by a dusting of the ground nuts of your choice.

You can use the nut butter of your choice. I’ve tried this with almond butter, peanut butter, and sunflower seed butter. All work equally well, as does pistachio nut butter, which I made a batch of recently. Here’s the recipe link to Pistachio Honey Nut Butter:

Pistachio nut butter. Easy to make at home and a worthwhile option to coat your chicken nuggets in before dredging them in panko bread crumb awesomeness.

Bonus Tip: Prep extra nuggets and freeze them in a single layer, covered well. When it’s time to eat, just remove them from the freezer and bake them according to the directions below. No thawing necessary.

Baked Nut Butter Chicken Nuggets

Ingredients to make 2-4 servings (2 as entree, 4 as an appetizer):

  • 1 pound of chicken breast, cut into chunks
  • Seasoning blend of your choice
  • Salt (ONLY if seasoning blend is unsalted)
  • 1/2 cup nut butter of choice, more if necessary
  • 1/2 cup panko bread crumbs (or alternatively,bread crumbs from a can, or ground nuts)
  • Splash of water (might not need)

1. Preheat oven to 450 F.

2. Season the chicken with the seasoning blend, adding salt if necessary.

3. Spoon nut butter into a mixing bowl.  Mix well. If it seems a bit dry, put in a tiny bit of water to loosen it up (it should be a texture that is slightly thinner than honey).

4. Place chicken chunks in nut butter and toss to coat, using your hands or a spoon to coat all sides.

5. Throw panko crumbs on top of chicken and mix well. If necessary, press crumbs into the chicken so they adhere. Make sure all sides of the chicken are coated with crumbs. Shake off excess crumbs.

6. On a baking sheet, in a single layer, bake the nuggets for 15 to 20 minutes.You don’t even need to turn them!

7. Serve with the side/s and or dipping sauce of your choice.

Read Full Post »

Mission (black) figs make an excellent jam when cooked with warming spices such as cardamom and cinnamon.

Canning and preserving has always both scared and fascinated me. On the one hand, it seems so practical, nourishing, and creative. It conjures up images of pantries full of summer’s bounty that can be enjoyed on cold, snowy nights.

On the other hand, it strikes me as highly technical and like there’s all sorts of specialized gear involved. I am sooooo not a technical person. I’m the type of person business concepts like Geek Squad are created for!

There’s something so primordial and elemental about fig leaves.

Luckily, jam and preserve-making needn’t be complicated. Rooting around online, I recently discovered that a quick fruit jam can be made on the stovetop, and stored in the fridge for a couple of months. Taste of Beirut featured a wonderful fig jam recently. Inspired, I chose figs as my fruit of choice for my first preserve making experiment. This beautiful fruit brings back wonderful memories of a fig tree we had at one point growing up. More on that in a moment.

I added in some vanilla extract and warm fall spices to give the figs a autumnal fragrance and taste, and am happy to report that the results were quite delicious!

The way the figs just soaked up the spices so well got me thinking about how versatile they are in general. For example, figs get shout-outs from numerous world religions :

  • Figs are the fruit that’s mentioned most in the Bible – They are prolific in the Old Testament, and in the New Testament Jesus uses figs in his parables.
  • Zamakkhschari, an Arabian interpreter of the Koran, reported that Mohammed said, “If I could wish a fruit brought to paradise it would certainly be the fig.”

  • While sitting under a fig tree, Siddhartha Gautama had the revelation that formed the foundations of Buddhism, and for Buddhists, the fig tree is revered as the tree of wisdom.
  • In the Hindu tradition, Siva, the Supreme Being, tempts Brahma with a blossom of the sacred fig-tree, dropped from heaven.
  • The Roman Bacchic cult used figs in their fertility rituals. Most ancient cultures actually believed they were an aphrodisiac.
  • The above factoids are all found at:  http://www.nutrafig.com/cheetahbar/story.html

Concentrating on this blog. Notice the big hair. Like they say down South, “The higher the hair, the closer to God.”

Back to that long-ago fig tree in the yard. My mom used to preserve figs off of that tree in the traditional manner every spring and summer. Those preserves were delicious, and one day I plan to get Mom to teach me how how to make them. Then I can store them in jars for cold winter’s nights and give jars of jam away as gifts. A taste of summer will only be a jar away.  For now, I’ll settle for quick preserves. Which, judging by this recipe, isn’t actually settling at all.

Mission Fig Jam with Warm Fall Spices

I used fresh Mission figs because they were what was available. Use the fresh fig type you have ready access to.

Ingredients:

  • 2 pounds fresh figs
  • 1 1/2 cups sugar (I mixed white sugar and brown sugar, approximately equal parts of each)
  • 1 or 2 Tablespoons pumpkin or apple pie spice powder
  • 1 Tablespoon vanilla extract
  • 1 teaspoon fresh lemon juice
  • Enough water to cover the fresh figs (start with a cup and work up from there if needed)

Directions

1. Wash figs. Mix sugar, water, vanilla extract, and spices together. Submerge the figs into this mixture, adding more water if more is needed to just barely cover the top of the figs.  Let the figs sit overnight, up to 24 hours. (It might be okay to let them sit longer than 24 hours, but I’d be careful, because the sugar will start to soften the fruit and break it down).

2. When you’re ready to make the jam, place the contents of the bowl, including any unmelted sugar, into a non-reactive Dutch oven (like a Le Creuset). Add in the lemon juice and simmer on low until a froth forms on top.

3.Gently stir and allow to simmer 45 minutes to one hour over a very low flame.

4. Test a fig for doneness. Enjoy some right away, because they’re seriously good warm,  but then let the rest cool and store in an airtight jar in the fridge.

Read Full Post »

Baby eggplants stuffed with lean ground chicken, pine nuts, scallions, and walnuts. Topped with a warm sour-cherry pomegranate sauce.

Maybe I”m too easily amused, but a trip to the farmer’s market is one of the highlights of my week. I’m quite obsessed with farmer’s markets, really. To the point that I’ll always try to hit up the local markets when I travel. It’s a cool way to get a feel for a city or town. The vibe, the people, the types of food that grow there. It’s informative, fresh, and chill.

Mini eggplants at my neighborhood farmer's market. A steal at $1.50 per pound.

Right now, eggplant is in season in my corner of the world. In particular, those precious baby aubergines, with hues ranging from lavender to deep purple. They were just begging me to buy them and stuff them silly.

Full disclosure moment: Today’s recipe is a total riff on something Joumana of Taste of Beirut did recently.  Her Eggplant in Walnut and Pomegranate sauce was too tempting to pass up. The first time around, I honored her recipe and it was fabulous. Then I decided to experiment and make a meat-stuffed eggplant with a sour cherry pomegranate sauce.

Fairytale eggplant, to the left. Yes, they're really called that. These petite beauties are delicious stuffed.

The eggplants are left unpeeled, then baked, and finally stuffed with a mixture of ground chicken, ground walnuts, scallions, and pine nuts. Then they’re sauced with a simple mixture of sour cherry preserves (or juice), pomegranate paste, and chili pepper. It’s a meal that’s satisfying without being heavy, and it’s pretty darn good for you too.

So thank you, Joumana and to my local farmers market for providing the inspiration for today’s dish.

So delicious, so healthy!

Stuffed Baby Eggplant with Sour Cherry Pomegranate Sauce

If you can’t find small eggplants, you can use bigger eggplants instead. Adjust cooking time accordingly. Sour (tart) cherry or pomegranate juices/jams can be used interchangeably for the sauce. Good to know in case you don’t have easy access to one or the other.

Ingredients:

  • 24 baby eggplants
  • 1 Tablespoon olive oil
  • 2/3 pound of ground chicken (can use turkey, lamb, beef if you prefer)
  • 1 Tablespoon Arabic spice blend
  • 1 Tablespoon sage
  • 2 Tablespoons za’atar (optional)
  • 1/2 bunch of scallions, thinly sliced
  • 2 cloves garlic, finely chopped or even grated
  • 1/2 cup ground walnuts (optional)
  • 1/4 cup of pine nuts
  • 1 Tablespoon tomato paste
  • Salt and pepper to taste

Sour Cherry Pomegranate Sauce

  • 2 Tablespoons sour cherry preserves OR 1/2 cup tart cherry juice
  • 2/3 cup pomegranate juice
  • 1/2 dried chili pepper
  • 1/2 teaspoon cardamom
  • pinch turmeric

Directions

1. Preheat oven to 425. As oven preheats, wash and pat dry baby eggplants. Line your baking pans or dishes with foil. Place baby eggplants on baking sheet or dish. Do not overcrowd. Bake for 30 minutes on the middle oven rack, testing for doneness at 25 minutes.

2. As eggplants roast, make filling. Warm olive oil in a skillet. Once it’s shimmery, add chicken, breaking up the ground chicken as you move it around the pan. When chicken is approximately half cooked (you’ll be able to tell parts of it are still raw), add in spices, including za’atar, if using,  plus scallions and garlic. Cook chicken until done. Next, add in scallions, pine nuts, ground walnuts, and stir. Add in tomato paste and splash of water if mixture is getting dry. Stir again, taste, and adjust seasoning to taste. Cook another minute or two more, then turn off heat.

3. Remove eggplants from the oven. With a fork or knife, test for doneness (fork or knife should slide easily through the eggplants). Place eggplants in a safe place and allow to cool.

4. As the eggplants cool, make the sour cherry pomegranate sauce. Simply mix all of the ingredients together, and cook over a LOW heat for 5-10 minutes, until desired consistency is reached. (If you want the sauce syrupy, feel free to cook for more than 10 minutes).

5. Now split each baby eggplant down the middle. Stuff each with a spoonful of the chicken mixture. If you have leftover scallions, use them for garnish. Or garnish with fresh chopped parsley. Spoon sauce over eggplants, plate, and enjoy!

Read Full Post »

This fast, fresh, and delicous avocado tabouli salad is a snap to make on the go. Take the avocado with you and mix the tabouli salad and avo together.

Hey Guys! I’ve been totally MIA, I’m well aware of this. For me, so-called “Summer Hours” involve working two jobs, so it’s not like I’ve been living a life of leisure in, say, the Caribbean. I WISH.

A random snap of morning glories in Harlem. Hmm, "Morning Glories in Harlem" sounds like the name of a play or something. Pic snapped this past weekend on a long walk.

So for days when I’m on the go, this avocado tabouli salad is a quick solution. It’s so simple, I’m not gonna even write out a full recipe. I just pack the avocado with me, keep the tabouli salad in an airtight container (after I’ve bought if from my fave Middle Eastern deli/falafel shack). When it’s time to eat, I bust out a butter knife, cut and slice the avocado, scoop it out, and mix the tabouli and avocado together. Sometimes I sprinkle with all or some of the following:

  • salt and pepper
  • olive oil
  • fresh lemon juice

That’s it! A fast, fresh, and mostly raw meal. I’ll be posting my own tabouli recipe at some point down the line–full of parsley, mint, and a surprise secret ingredient or two, but first, let me get to the point where I can actually make tabouli again. Not gonna lie–it’s a bit of a process, and I don’t have time at the moment.

In the meantime, enjoy this energizing and filling recipe, and I’ll see you all around again soon. Xoxo!

Read Full Post »

Green Herb Hummus made with Great Northern beans, fresh farmer's market basil and garlic, plus Celtic sea salt and olive oil.

Today’s recipe isn’t so much a recipe. It’s more of a template, that you can adjust and re-configure to your liking. Motivated by hunger but de-motivated by the heat to cook, I ended up making a really great hummus with what I had on hand, and figured I’d pass along my results to you. By the way, if hummus plus bread sounds too heavy, ditch the bread and dip raw veggie slices into this dip. That’s what I do and prefer.

If you’re bothered by the non-traditional ingredient list and the fact that I’m calling it hummus, feel free to rename it as a bean dip or whatever other moniker rocks your world.

Love this stuff! I like to dip raw sticks of summer squash, zucchini, carrots, and celery in it instead of the traditional pita bread dip.

Keep things flexible when making this. Since I didn’t have chickpeas handy (not to worry, I’m properly re-stocked now!), I used Great Northern beans, a white bean I happen to really like.  I was also fresh out of tahini, so I used olive oil as the fat instead. There was a small bunch of farmer’s market basil I needed to use, plus some fresh, pungent garlic picked up recently from that same market that had yet to be put to work. A couple of fat cloves of that garlic really took this dip up a level in my opinion, but if garlic isn’t your thing, feel free to leave it out.

Green Herb Hummus

Ingredients:

1 14-16 ounce can of Great Northern beans (or chickpeas or cannellinis) Basically, choose the light-colored bean of your choice

2 fat cloves of garlic

1 small bunch of fresh basil (or other herb of choice such as cilantro, parsley, sage)

1 Tablespoon (or less) of olive oil

Salt of choice to taste (I used Celtic sea salt. Full of minerals and has a robust flavor)

Water (if needed)

Directions:

1. Drain and rinse beans.

2. Add all ingredients except for basil and water to a blender or food processor and mix, starting on a low setting, gradually increasing to a higher speed.

3. Once ingredients are fairly well-mixed, add in basil leaves and a tiny bit of water if needed to help facilitate the mixing process. Blend until smooth and creamy. Check  and adjust seasoning and serve (or store, airtight, in the fridge.)

Read Full Post »

FaRAWfel anyone? A fun raw falafel ball recipe to kick of your Meatless Monday.

I’ve been really into raw foods lately. I find that as the weather warms, I like more salads, more smoothies, and lighter, cooler fare. Such choices feel better to me. Raw food fits the bill beautifully, and it energizes me quite nicely. However, there’s no reason we can’t pack our raw goodies with some good old Middle Eastern flair.

Really good falafel can taste meaty. And my raw version tastes very meaty, too!

That’s exactly what my sister Mona and I did with our FaRAWfels. Also known as Raw Falafel. It’s simply a meaty tasting nut pate with Middle Eastern spices tossed in for that special flavah. I noticed a raw taco nut “meat” recipe on Averie’s blog. I tried it and it was awesome. No surprise there. She has great recipes 🙂 .

Then I decided to take her basic template and put the falafel spices into play and see what happened. Good things, that’s what!

Mona and I enjoyed them for dinner atop a raw kale salad topped with my tahini red pepper dressing. We had this delicious meal recently after taking a nice, long walk around one of NYC’s most vibrant neighborhoods– East Harlem, which is also called el Barrio. Before we get to the recipe, take a look at some of what we saw and we strolled around on a Sunday afternoon. I love that the Barrio has tons of murals and little hidden community gardens:

This slideshow requires JavaScript.

FaRAWfels (Raw Falafel)

Modified from a brilliant nut pate “taco meat” recipe of Averie’s on LoveVeggiesandYoga.com. To keep it strictly raw, use all raw nuts and seeds.

Ingredients:

1/2 cup Almonds

1/2 Cup Walnuts

1/4 Cup Pecans

1/4 Cup Sunflower Seeds

1/3 C Sun Dried Tomatoes loosely packed (I prefer those that aren’t packed with oil. If you used oil packed, you can probably use less olive oil)

2 Tablespoons Middle Eastern Spice Blend of choice (Click here for my blend)

2 Tablespoons paprika

2 Tablespoons za-tar blend of choice (Optional)

2 to 4 Tablespoons of Olive Oil

1 Tsp Salt (or to taste)

Directions:

1. Gather ingredients.

2. To a blender or food processor, toss in nuts, sundried tomatoes, and spices.

3. Add olive oil and blend until the nuts are broken up and the ingredients nicely mixed. Go slow–I like mine a bit on the chunky side, with some whole seeds left. You might need to add a tiny touch of water to get things moving. Go easy if you choose to add water.

4. Roll into balls and serve.

Read Full Post »

Marinated olives! Easy, quick, and tasty. Photo by Stacey Young.

Once, many moons ago, I didn’t like olives. Yes, I know, hard to believe, right, especially seeing as I pretty much live for them now! I think my dislike stemmed in part from the fact that up until a few years ago, most olives available in the United States were mainly canned or jarred and not so high quality. Too salty, to briney, sometimes too mushy. Plus, it didn’t help that the only olives I’d ever really seen were in martini glasses (chic, but not an everyday drink–at least not for me  😉 ) or embedded in bologna (ick).

A beautiful olive tree. To me, olive trees look like a cross between a shrub and a tree. Either way, they're gorgeous. Photo courtesy of istockphoto.com.

At a long-ago dinner party, though, all of that changed. My friend Amy brought some marinated olives to the gathering, and I decided to take a chance and try them. Boy am I glad I did. They were so fresh, and the herbs (rosemary and parsley, I think) and that extra dousing of olive oil really made their flavors sing.

Look at their silvery leaves! I think those leaves are so beautiful, not to mention the olives themselves.

During my trips to Syria and Spain, I fell a bit deeper in love with the humble yet mighty olive. Their trees are almost more like a cross between a shrub and a tree. They look so non-descript at first, with their cute little silvery leaves. Yet they’re so powerful. One might even say mythical. The amazing olive (and its branch) has played a role in history since ancient times. Even the Koran namechecks the olive, mentioning it six times.

Today’s recipe couldn’t be simpler.  Pick the most gorgeous olives you can find. Drizzle them with the highest quality olive oil you have on hand. Bits of garlic and herbs add color and punch. These marinated olives make a great dinner party appetizer! Remember to put them in the fridge if you don’t gobble them in one sitting.

Levant Style Marinated Olives

1 cup of olives of choice

Olive oil for drizzling

2 garlic cloves, finely chopped

Herbs of choice (I like parsley best)

Directions:

1. Toss olives gently in a few glugs of the olive oil. Add in herbs and garlic, and toss again.

Read Full Post »

Double Cabbage Salad travels well and is so satisfyingly crunchy! This pic shows the salad naked, but it travels well when dressed. Love that.

I love salads. Yes, I’m quite aware that some people might not believe me when I say this. That’s understandable. In too many instances, salads are a lame side dish or something to be “gotten through” en route to the main meal.

Let’s take a moment, though, to open our minds to the possibilities. Salads can be so creative, so colorful, and satisfying enough to serve as a meal. Plus, they’re so energizing–full of vegetables and whatever other goodies your imagination can invite to the party. I eat a large salad for lunch several times a week. I do this for many reasons–it’s healthy, filling, and, assuming it’s the right kind of salad, the meal can be made ahead and travel well.

Yes, salads can travel well. Today’s salad, for instance, travels like a real champ. With the right kind of container, you can take the Double Cabbage Salad on the road already dressed. In fact, the cabbages are so sturdy that they hold up well to dressing, and even taste better after having soaked in the dressing for awhile. It’s like a bit of marination on-the-go.

Get creative with the ingredients and toppings for this salad. I love to chop up an avocado right before serving and top the salad with it.

My Yoga amiga Renee inspired this dish. She brought her own cabbage salad to a raw food dinner party some mutual friends threw recently. We all raved at the crunch and amazing taste. Once home, I created my own spin on this salad.

Today’s recipe is deliberately imprecise. Feel free to get creative with the ingredients. I sure do! Every time I make this salad, it’s a bit different. Today, for instance, I was out of celery, so I left it out. But I did have red bell pepper on hand, so I tossed in a few pieces for a sweet flavor and gorgeous color. Ok, here we go with a basic template for a Double Cabbage Salad. Feel free, by the way, to post your ideas on what  you’d add in the comments section.

Double Cabbage Salad With Tahini Lemon Garlic Dressing

Ingredients:
For the Salad:

Equal parts chopped savoy and purple cabbage

1/2 small onion, finely diced

1/2 bell pepper, chopped

1/4 cup walnuts (toasting optional)

Few tablespoons chopped herbs of choice (the salad pictured uses cilantro, parsley)

Optional topping ideas: Avocado chunks (right before serving!), tempeh, fava beans or chickpeas.

Salt and pepper to taste


Directions:

1. In a large bowl, toss all ingredients together. Season to taste with salt and pepper, if desired.

2. Dress with dressing of choice. Cover tightly to store.


For the Tahini Lemon Garlic Dressing

1/4 cup tahini sauce (if you don’t have, try a nut butter like almond butter)

Juice of one lemon

2 garlic cloves

Salt and pepper to taste

Filtered water to thin dressing if needed.

Directions: Blend all ingredients together in a blender, adding filtered water as needed to thin dressing to desired consistency.  Store dressing or use immediately on top of salad of choice.

Read Full Post »

In my memories, halva looked like this, and tasted amazing--like a milder, drier peanut butter with a warm sweetness. I've since learned that there are many flavors and styles of halva. All delicious, I'm sure! Photo courtesy of http://de.academic.ru

One of my Yoga students and I were talking recently about found objects. He was rocking a sweater that he’d lost for two years. He’d come across it recently, buried deep in a closet. He was slightly thrilled to have pulled it from the abyss. It was there waiting for him all along, it seemed, even though he’d long ago written it off as lost.

“Finding something like that is kind of like finding an old friend, isn’t it?,” I asked. He agreed.

The same concept can certainly apply to food, I think. One of my most precious lost-then-found foods? Halva.

Years ago, as a kid visiting family in Iran, I remember eating this pasty, thick, energizing treat with breakfast. As a kid with not too many culinary points of reference, I remember it reminded me of a mild peanut butter, with a drier texture. One of the many things I liked about it, even then, is the way it was sweet, but not too sweet.

Turns out I was right–it was indeed a nut butter, and one that was sweetened, but not aggressively so. Well, technically, the one I remember was a seed butter. Of sesame seeds in particular. . .But let me not get ahead of myself.

The type of halva I remember from childhood was made from a sesame see base. In Arabic, it's called halawa. It's all based on an Arabic root word, halwa, that means sweet.

Many years passed, and I sometimes was reminded of that amazing food, but never thought to ask anyone what it was, or even where I could find it. I’d only had it a few times, but I’d find myself missing it from time to time. But halva was somehow locked away in a time warp, a part of my past I’d allowed to slip away.

More time passed, and one day, after moving to New York, a friend casually shared some with me. At first, I didn’t think it could possibly be the treat I’d enjoyed so many years ago at my aunt and uncle’s house, eating a breakfast spread out on a tablecloth on the floor, surrounded by cups of steaming tea and chattering  family and love.

But it was. “What is this stuff called?,” I asked. Because you see, I’d never known its name.

Halva,” he replied.

Pistachios are one of many types of nuts that can dress up halva.

Memory has a funny way of distorting things. It’s easy to idealize or demonize the past. In the many times I’d wondered about  halva, I’d also thought, in the very next moment, that there was no way it could possibly be  as delectable as I remembered.

I was so, so wrong. It was even better than I remembered.

Ok guys, don’t laugh. I have to admit that tears sprang to my eyes when I ate that first bite of halva after so many years. It was like being reunited with a long lost friend. With a past that still lives in my heart and with the family I haven’t seen in so very long. With my childhood memories. Unbelievable.

The fact that I could walk down memory lane via halva? Kinda crazy, I know. That I can walk to a nearby store and actually buy this stuff still boggles my mind. For that reason, I don’t eat it all the time. It seems too precious for that, somehow. So I buy it occasionally, and really savor every rich, dreamy bite.

I suppose I could learn how to make it, but I haven’ t yet bothered. I’ve since learned that one could have an entire department store devoted to halva. The kind I had was only one of many versions. There are flour and semolina-based versions. There are halvas based on lentils and even vegetables like pumpkin.  Every country and region and probably even province from Greece to Afghanistan seems to have its own take on halva, with the spelling variations to match 😉 . Which is wonderful, and I hope to try as many as possible.

For now, though, I’m content with the minor miracle of having halva back in my life in the first place. And yes, I sometimes even still tear up a bit at that first bite. Which I suppose is somehow appropriate–Only as an adult did I learn that halva is a traditional food at funerals in Iran. Passing into the next life with something sweet, nourishing, and light for those left behind to enjoy? There could be worse things, I suppose.

Read Full Post »

Zatar. Not many of my friends have heard of this wonderful stuff, so I often serve it as an app at dinner parties to spread the good word. So what is it?

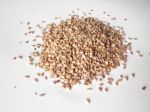
It’s generally a mixture of toasted sesame seeds. . .

Sesame seeds.

. . .and very finely ground dried herbs and spices.

Herbs in their dried and finely ground form are another key ingredient in zatar.

There are probably as many iterations of zatar as their are towns in the Middle East. (For that matter, there are several different ways to spell it: zatar, zahtar, zaa’tar, and so on). Herbs like thyme, oregano, sage, and rosemary, to name but a few, can find their way into the mix.

The most fun place to buy zatar? In my opinion, it’s at the spice market or a specialty foods store with spice bins. You can find it online, of course. But as for spice markets, here’s a pic of one in Istanbul:

A spice market in Istanbul. Not Constantinople 😉

So here’s the lore on zatar. It’s filling, but won’t weigh you down. (Wow, that sounds kinda beer-ad-sloganesque!) Students often eat it before exams for energy and alterness. It’s cleansing and aids digestion, which is why some people swear by it as a weight loss aid. It can help you out if you’re feeling unwell. (Again, the whole cleansing thing).

There are many ways one can use zatar. For example, a popular way to enjoy it is as a topping on warm pita. I like to sprinkle it on salads and roasted vegetables. Most often, though, I make a quick zatar dip. It’s simple.

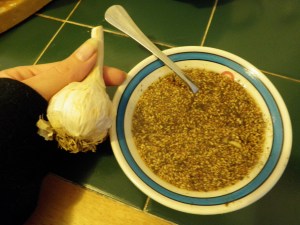
Zatar, just before I chopped and added a clove of fresh garlic to the dip.

This is how I make the dip: I pour some zatar in a small, shallow bowl. I pour olive oil on top of the zatar, and mix well. Then I put fresh pieces of chopped garlic bits on top. Yes, I eat raw garlic sometimes. I happen to really love it. Don’t knock it–it’s a very good immune system boost. Just make sure to enjoy it with like-minded people. Or alone!

Call this dip a triple threat: I’ve eaten this dip as an appetizer, as part of brunch or breakfast, or alone for dinner. Well, not completely alone–with some pita for dipping.

Some people like the dip more oily, and less pasty. My personal preference is to let the zatar stand out, while the olive oil binds it all together. Otherwise, you have an olive oil dip flavored with zatar, not a zatar dip with some olive oil. Of course, adjust the thickness of the dip to your preference. If you end up with too much oil, add more zatar. If you end up with too much zatar, simply add more oil.

One very important note: Many zatar mixes are pre-salted, so keep this in mind if you’re adding it to recipes.

Have fun! Feel free to share some of your zatar uses with me in the comments.

Read Full Post »

Older Posts »